Following the success of HPE Alletra dHCI, the term ‘disaggregated’ has resonated strongly with HPE customers.
With this new storage architecture, HPE is taking a step further with Disaggregated Storage infrastructure to separate an array’s storage capacity from storage compute resources. These disaggregated ‘nodes’ can be tailored for each customer’s use and combined into a logical storage pool, with storage resources provisioned to specific server instances.
And the Alletra MP isn’t just a storage array. It’s an entirely new architecture based on Scale-out Disaggregated Storage Architecture utilizing NVMe storage fabric. Building blocks for the Alletra MP are entirely modular. They can start with a single standalone Controller system, through to a Controller system with directly attached JBOFs (Just a Bunch of Flash), through to the RoCEv2 (RDMA over Converged Ethernet) switched Fabric with multiple Controller systems and JBOFs all working in unison to service storage traffic.
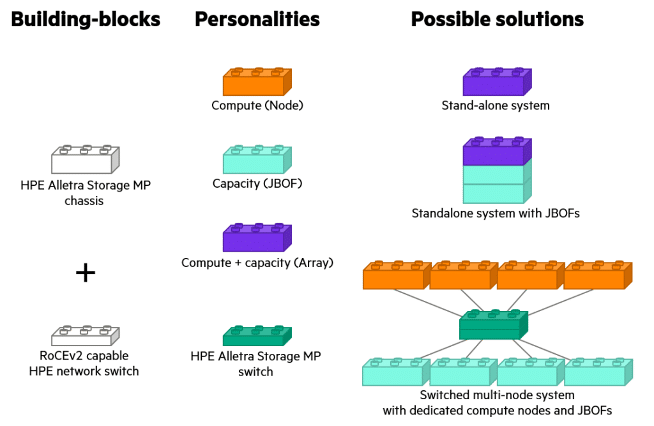
What’s great about this is that we can start with a minimal single-node system and quickly scale capacity and performance. Resiliency is increased as data is distributed and accessible by many constituent parts. If one node is lost, the computer can find another path to its data. Management is streamlined because the entire system can be addressed as a whole, and resources can be added, upgraded, or replaced without disruption.
Let’s dive further into what HPE’s Disaggregated Storage Architecture has to offer.
Robust controller node hardware
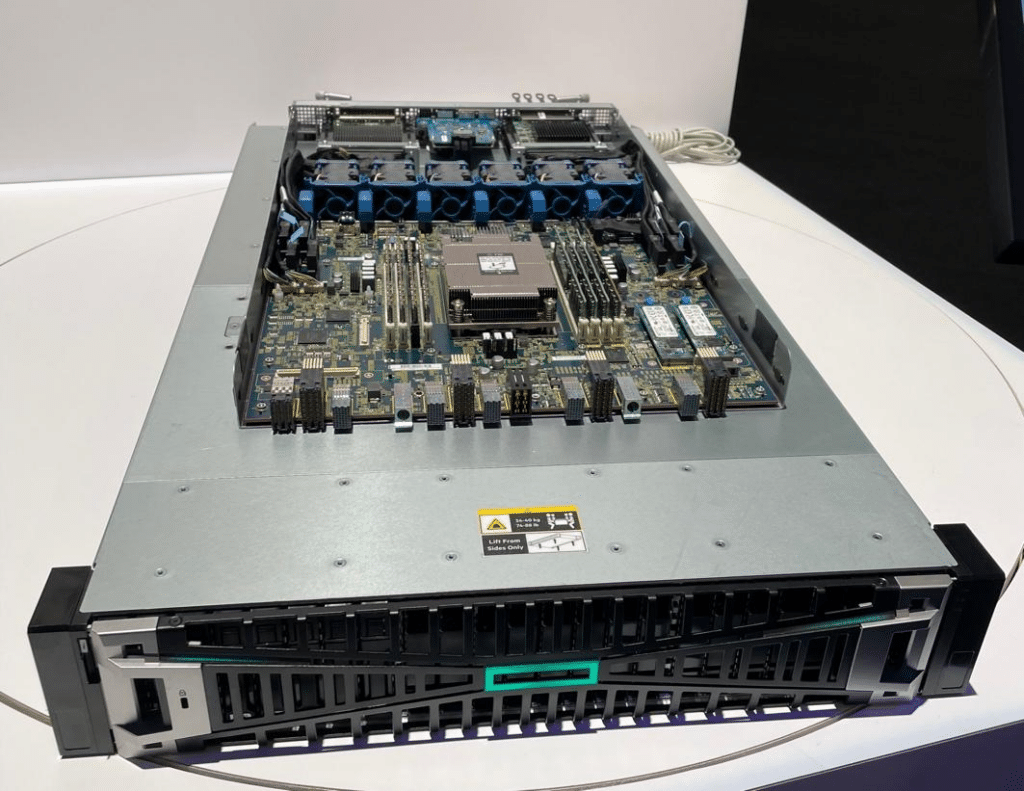
The C-node chassis is essentially a 2-controller, active-active All NVMe system. It currently ships with eight or 16-core processors, dependent upon the performance requirement, in a single 2U Chassis.
The architecture is designed with performance and availability in mind, built with an “all-active” design whereby all components engage in I/O processing. Multiple layers of abstraction ensure data is laid out on the physical NVMe drives to maximize efficiency in data migration, snapshotting, performance and wear. The all-active design steers towards system-wide striping and automatically stripes volumes across all system resources, delivering predictable high levels of performance.
Each Alletra MP storage enclosure can support up to 24 dual-ported NVMe drives and 4 OCP slots, up to 2 of which can be used for Host IO and two for Southbound storage fabric connectivity (expansion enclosures). Currently, the Alletra MP for Block supports Fibre Channel and NVMe/FC protocols — simultaneously.


The controllers can be equipped with eight or 16-core processors and 256GB of RAM. Each controller node is connected to the other via 25Gb cluster interlinks using a low-overhead RDMA protocol. The chassis has eight populated DIMM slots and 2 M.2 boot devices.
An enhanced installation experience
I’ve installed plenty of HPE storage arrays over the years, mostly HPE Nimble and Alletra Arrays, amongst others, so I had high hopes that the installation experience would be good. More recently, HPE arrays must be registered into the HPE GreenLake DSCC (Data Services Cloud Console) as a prerequisite to running the configuration wizard, and the Alletra MP is no different.
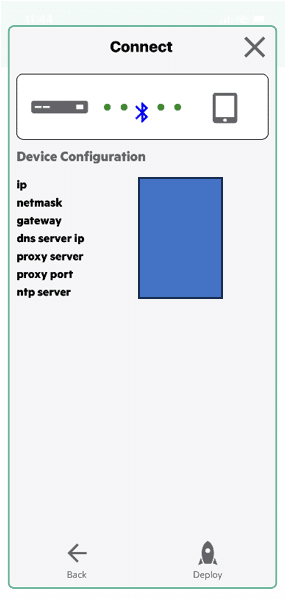
Once the array is registered in DSCC, we have the option of either running the initial setup via the HPE discovery tool, which is a small utility you run on a workstation to discover arrays on the same LAN segment – very similar to the previous HPE storage setup manager if you have used that before – or the Bluetooth based HPE Storage Connection Mobile app (runs on iOS or Android).
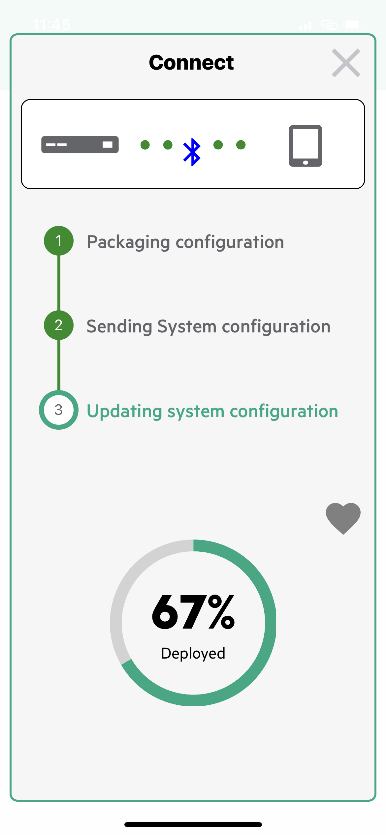
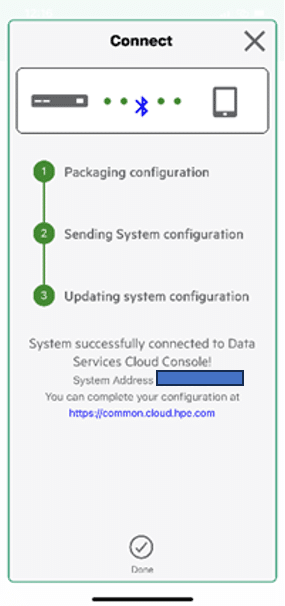
I opted for the Bluetooth option, which involves connecting the Bluetooth dongle to the array and scanning for devices on the HPE Storage Connection app. I must admit I didn’t expect this to go smoothly — but the process was actually a dream.
Once the App has discovered the unconfigured array, you simply enter the network details that you want to configure the array with, select deploy, and off it goes; it sets up the management configuration, contacts the DSCC, and ensures that the array is already registered, and that’s that.
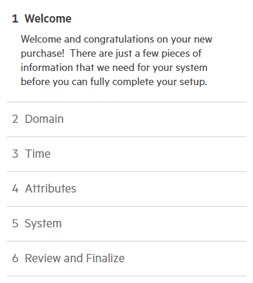
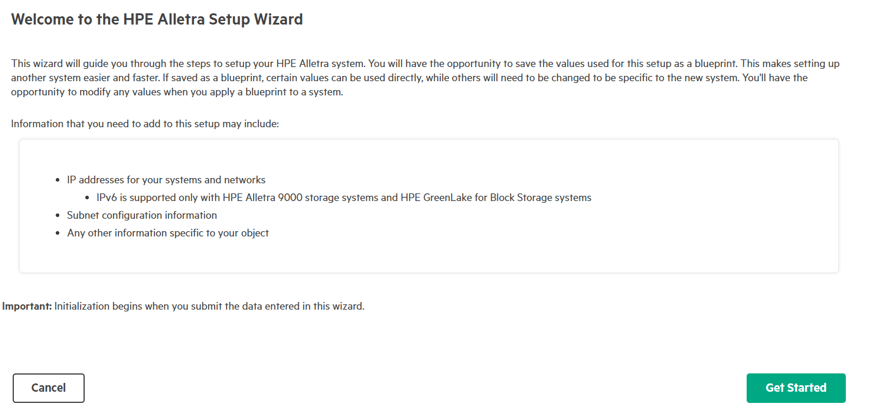
Next, we had to return to the DSCC and finish the initial setup; this was nice and straightforward. Run through the six steps, and off it goes:
- Welcome: Provide some background information to get your setup started.
- Domain
- Time
- Attributes
- System
- Review and Finalize
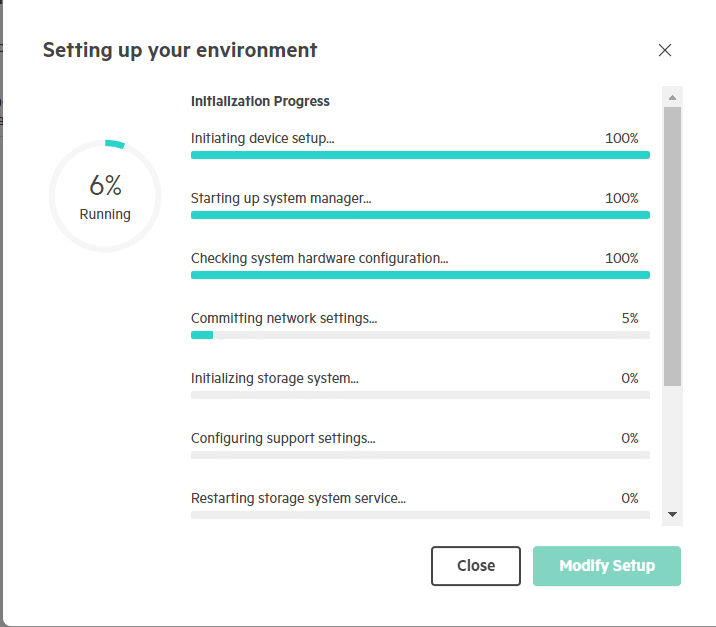
From this point, you can either login to the array GUI or utilize the DSCC to manage the array.
I opted to utilize the local GUI on this occasion, more for habit than for any other reason.
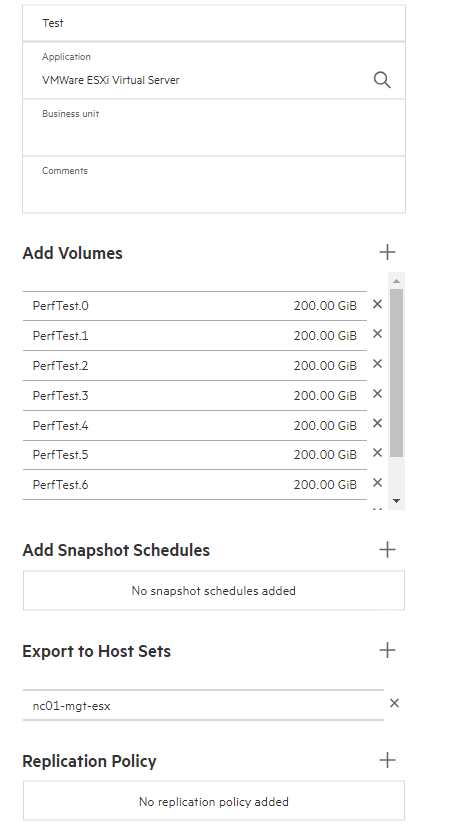
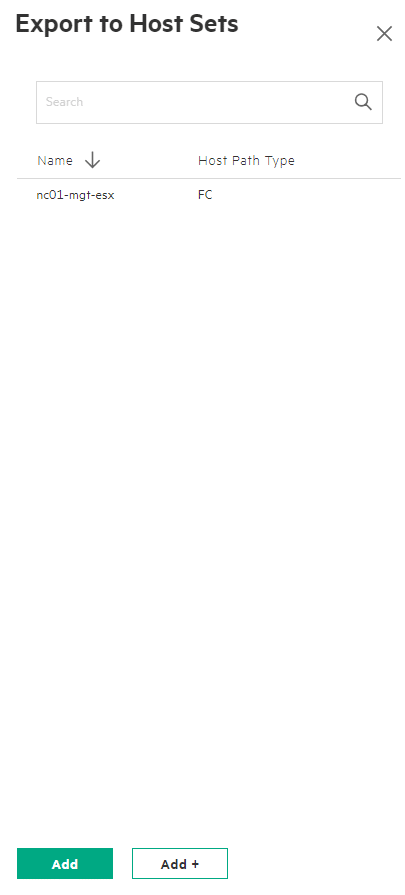
An excellent tutorial built into the GUI then takes you through the storage configuration steps. However, it’s more of a case of defining the Host sets, creating the application sets, and then the volumes themselves.
It’s also important to note that there is no need to create and manage RAID sets, Disk groups (or whatever terminology you prefer to use); the system automatically sets and manages the data distribution. We define the application sets (consistency groups) and the volumes that make up that consistency group.
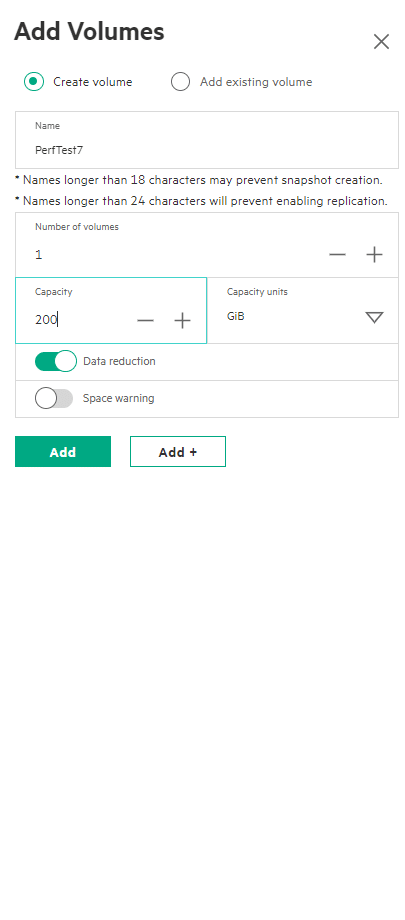
When creating the volumes, it’s a familiar feel to previous HPE storage products with concepts of “Application sets”, where you define what the application set will be used to store, and the system tunes the volumes based on that intention. Then, create and add the volumes, which is simply a case of setting the size and choosing to enable data reduction or not — data reduction being both inline deduplication and compression.
The Snapshot and replication scheduling can be defined at this time, too. It’s possible to configure a layered approach to snapshotting with multiple schedules running on the same application set to achieve that Grandfather, Father, Son type arrangement – if required.

Apart from any Ethernet or Fibre Channel switch configuration needed to support the installation, that was that. The system is set up, storage configured and presented to hosts. In this instance, I did have to log into vSphere and rescan storage before creating a VMFS volume, etc.
One final note: the Alletra MP disk inquiry string is displayed as a “3PARdata Fibre Channel Disk”, which can potentially be a little confusing if you are not expecting it and if you already have 3Par storage in your environment!
Thanks for continuing to follow this series of insights! In the next article, I’ll cover the management features of the array.
In the meantime, if you’re looking for some specific guidance on the benefits HPE GreenLake can pose for your business — get in touch with one of our experts!
")

Share: